.jpg)

CNY Eve Battle

As it is the custom of the Lim family to wage war on CNY eve, we have used this opportunity to launch an expedition against the rebel Hag Queen Hella. Rather than giving long and wordy descriptions, we will simply attach photos with comments. Enjoy folks. It is the first time that I am leading an army by the way.

The view of the rebel druchii army from the vantage point of the hill where the Nubian archers were stationed


Last chance to parley with the rebels

Waving his big sword, the Druchii Knighty Master challenge Emperor Basil to one on one combat.


The Imperials know that they cannot left this go on forever. Therefore Repanse ordered a general advance with the cavalry.

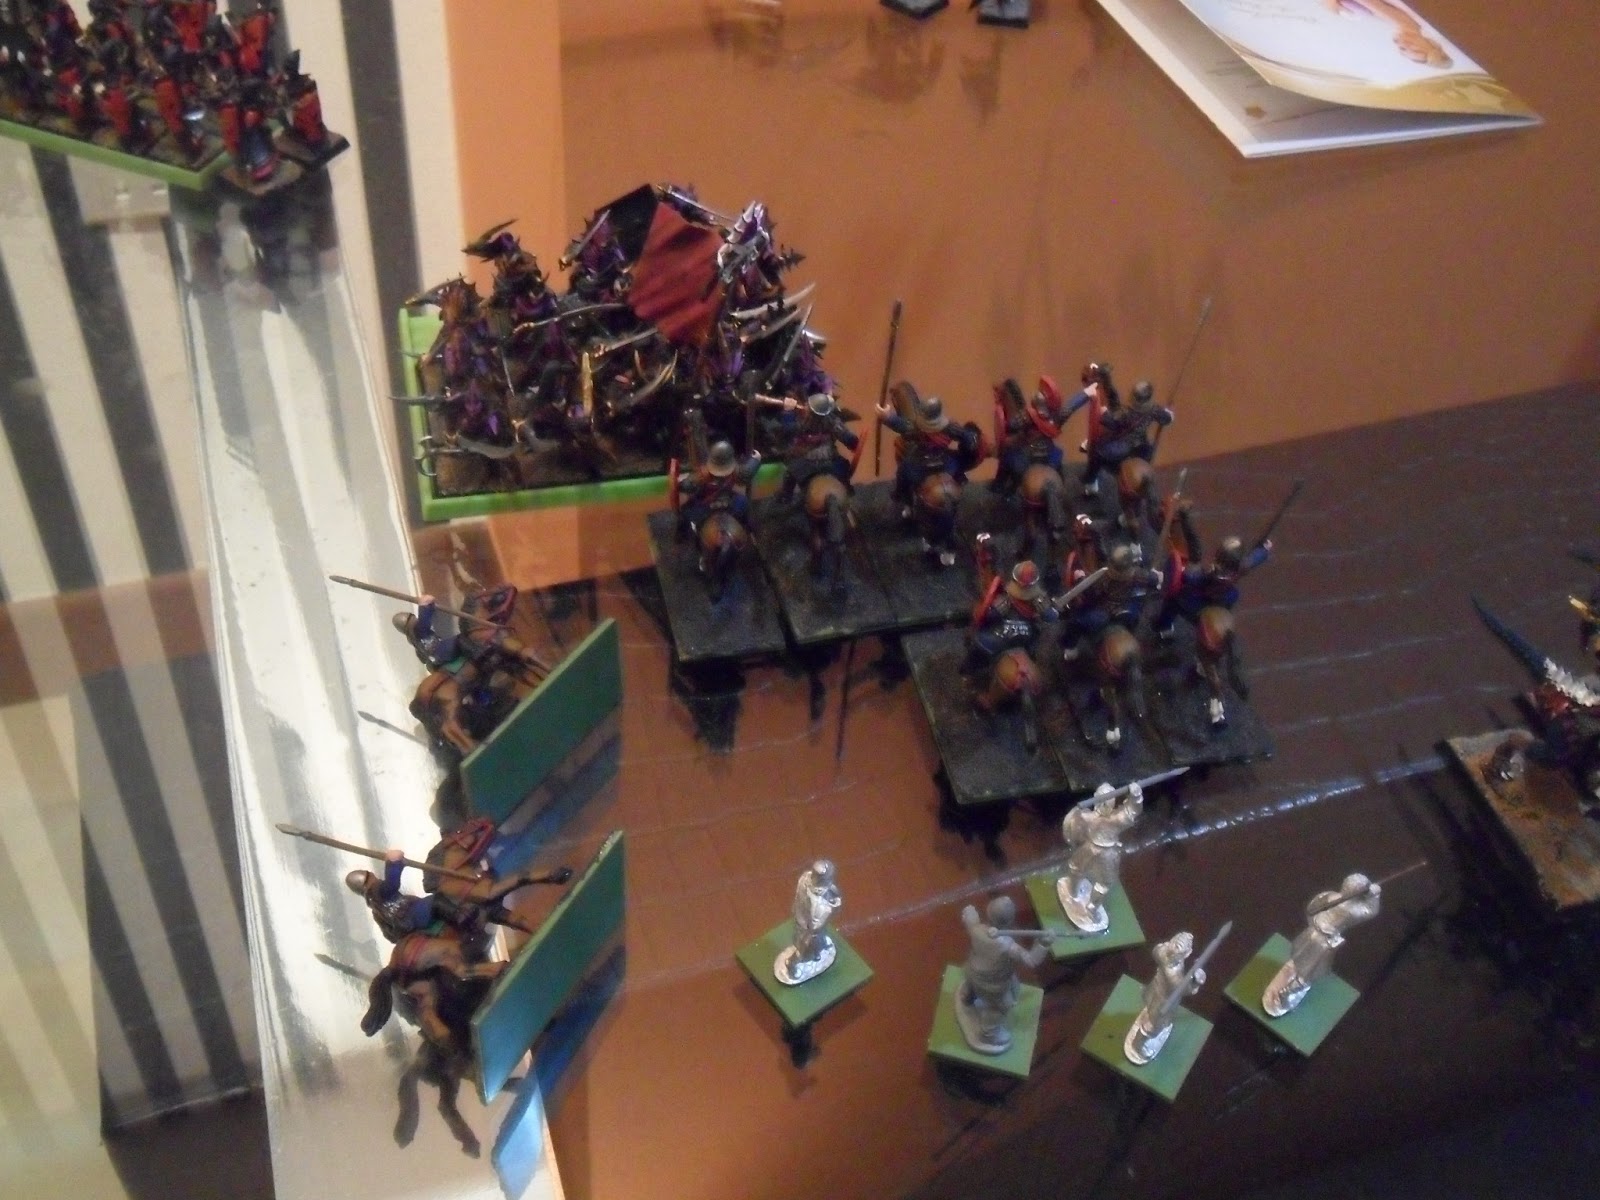
The Light cavalry make a bold advance towards the corsairs with the real objective being the crossbowmen in the far druchii right. The light cavalry are not afraid of being charged by the corsairs as in the event the corsairs charge, the masses of Byzantine horses should be able to overwhelm the Cold One knights in the following turn.


Meanwhile the druchii shades and rbts fire all they got at the cataphracts but there were still so many of them left. Are the rebels going to lose both flanks to the Imperials?

On the Imperial right, the cataphracts charge the witch elves. If victorious (most probably), they will overrun into the executioners and the roll over into the shades.


And on the far left, we see the light cavalry charging the druchii crossbowmen. This seems to be a masterstroke by Repanse. Surely the rebel lightly armored infantry will crumbled under Imperial steel. The cold one knights should be chicken feet for Repanse rite?

Meanwhile the Nubian archers managed to snipe some shades.

Hey what's this? The mighty cataphracts are defeated by witch elves??? This cannot be.

Repanse's Latin knights drawed with the cold ones also with equal casualties sufferd by both sides. Repanse unit had only 5 models left, any further defeat will result in an autobreak.

At the left, the light cavalry actually lose combat...but they manage to hold....

Oh no, here we see the witch elves pursuing the cataphracts and ramming into the loyalist Druchii!!!

During the shooting phase in the Druchii turn, the Nubians suffered heavy shooting casualties and quit the field.

Sure enough, Repanse unit was defeated during the Druchii turn's combat phase, the unit broke and was chased down. The C in C herself was captured. The Cold ones pushed very closed to the spear elves. Sorry for the poor picture here. Never realise it was so dark

But the Witch Elves do not need the help of the cold ones, they easily beat the spear elves and run down the unit, cutting down the Imperial BSB in the process.

In the close combat phase, the medium cavalry cause 1 less causalty than the enemy...

The medium cavalry broke and the Corsiars pursue into the javelins while the former got away.

We are now at the Druchii turn. The Cataphracts had rallied previously and were treated with heavy fire by the Druchii ranged troops.

During the close combat phase, the corsairs beat the javelin men and overrun into the difficult terrain. We see the Cold One Knights here, earlier during the movement phase they had chased the medium cavalry out of the board.

Back into the Imperium turn, the light cavalry seek shelther behind the forest (represented by the colorful CD)

While the surviving cataphracts charge the shades hoping to at least destroy one druchii unit and earning some VP.

But it was not to be so, the cataphracts suffered from rubber lances syndrome again and to the horror of the Imperials, all the cataphracts were killed. Basil has to flee, the 3rd time in this entire battle.

Here we see the Druchii trying to catch Basil alive or shooting him down via shooting. Luckily for him, the Witch Elves are frenzy and had to charge, Basil thus fled off board and escaped capture.

And so it ends, the Druchii had wipe out all but one unit of Imperials while giving no VP in return. There are some casualties but these are mostly replaced for the next battle.

The Imperials are lucky in that the reinforcements for the druchii are delayed (in real world this is reflected by the delay in the release of Heroes 6 shades of darkness). So the Druchii could only replace their more basic units, the precious COK are not replaced. (This is a decision in my part because I realise the Druchii are too powerful. The pointage introduced by Leongrande are still not enough to address the powerful WHFB 7th Ed Dark Elf book. So what I decide is to use back the original warhammer point cost for the next battle and find some other way to balance things out).
Other comments: This game is a good opportunity to test out some trial rules. I have not got a chance to try my flank charge trial rules but I did use my version of step up. As brought up earleir my friends, it is too troublesome and easily forgotten in the heat of battle. Therefore I now fully support GW WHFB 8th Edition's version of stepup. After further discussion with Soo days after the battle, I also began to understand the reason for GW's "fight in 2 ranks rule". The main reason IMO was due to fun, admitedly it is not so fun to see so many troops dying without even a single chance to swing a weapon. I personally dun think it is a big deal combining step up with fight in two ranks but we shall see in my coming WHFB game with Lawrence, Elmer and Fabian (I am not using any horde formation at all so it will be a good test).
In the next game, I will draft up a new Byzantine army to take on the Druchii. I will significantly reduce the number of Byzantine cavalry as these are expensive. In fact I am a bit fearful that they cannot survive my historical battles with lawrence and fabian. 1 single WS4, S4 attack with 2+ or 3+ save at about 40 points...I am not so sure if it is a good deal anymore,
posted by Vern | 12:28 PM
![]()
0 Comments:
Post a Comment
Subscribe to Post Comments [Atom]
<< Home