Vern and his Wonderous Journeys

My Photo
Name:

check my friendster la. i dun update there for nothing

Saturday, August 19, 2023

The Attack on Fort Colonial Sona Italia

Chris and I had spoken about playing a tabletop battle for quite a while already.  As we had been delaying since March this year, I decide to oblige him.  The thing about him is that he only likes humans and he likes guns.  Given my limited collection of human troops, I designed a game of human colonist vs alien indigenous natives.  The rule is is old 40k but simplified and I will be using the harmonised weapon profiles in my houserules (I had created a list of weapon profiles all the way from ww2 era to sci fi ).   Chris will be using an army of humans (Italians as basic troops while support by elite units of TAK and stormtroopers) while I field lizardmen.  So here goes.

~~~~~~~~~~~~~~~~~~~~~~~~~~~~~~~~~~~~~~~~~~~

A peaceful morning in the fort of Sona Italia, the colony going about their daily business,

Meanwhile a warhost of indigenous lizardfolk gathers, let by the Skink hero with Stegdon helm. (Both this game, both Chris and I chose a miniature as our character.  The character is for cosmetic purpose only, he can do no damage and cannot be killed).


The full might of the warhost. charging out of the jungle!

First blood goes to the natives, as a bolt thrower shot take out a L6/40 tank.  Is it poor armor of the tank? or is it the pure magic of the natives? [i rolled 3 plus s6, just nice pen it]


Chris did well too.  Taking out a salamander with small arms fire.


End of Turn One of the humans, the lizardfolk natives had lost one and a half squad of skinks and a salamander.

The natives drew closer, showering the human defenders with darts and javelins.  But only slight damage are done.  The stegadon is just too far to ram into the fort.

The humans seize their chance! Concentrating fire onto the stegadon.  1 wound left!

Alas, the Sahariana armored car drove by and peppered the beast with 10 machine gun shots, shredding the platform and the beast.

Their big dino gone...

The lizardmen folk were undaunted and charge into the human lines.  Skinks form the first wave.

Some lizardmen folk took cover behind the barricades.

I made an error in this photo.  This is turn 4, the lizardmen reinforcements arrived in the form of a bastiladon and a Troglodon, but i made a mistake and did not capture the two models.  Nevertheless, the saurus joined in the fray as well.

The humans first wave of reinforcements arrive with a M13/41 guns blazing.  (Chris made the choice of delaying his reinforcements.  His reward is his tank will come first)

Turn 5, the lizard folk punched through the walls of the fort (did 12 damage!)

The last of the human reinforcements arrived.  Five elite storm troops dropped in.  Meanwhile Chris sent his engineers to engage the Saurus in CC, hoping to stem the tide.

The new reinforcements with melta, plasma and the missile launchers and howitzers of the existing garrison forces blasted through the thick armor of the bastiladon.  The beast that he so dreaded is no more (he fired almost 90% of the army's shots into it)

The lizardfolk forces are spent.  The hero assaulted the stormtroopers with harsh language while the troglodon charge into combat.

Game ended with the troglodon still fighting with the storm troopers in cc.  The saurus survive but were too far to do a thing.  Chris still has the full force of his garrison on the right and two vehicles with 4 MGs in total left.

Well it is a fun game and great that Chris enjoy it.  He wanted another session soon but a bit more serious and more balance.  I do not want him to be too distracted so I do intend to continue to let him play simplified rules and will still design scenarios for him.  Nevertheless, I conceded that there are some refinements that I need to make

1) include a mechanism for deliberate retreat, and pursuit

2) insert new weapon profiles!

3) to decide if we still want more modern-primitive matches.  if so better establish the profiles of the dinos in advance!

4) Chris asked for a medieval/fantasy game next.  I need more human troops next year. COS, when release!

Friday, July 14, 2023

Infinity Campaign Game with Eddie 14072023


Mission: Highly Classified

Tartary Army Korps (Vern) vs Yujing (Eddie)

The forces of Tartary Army Korps infiltrated into the Yujing stronghold in Helios, they are to undertake a Highly Classified mission.  The TAK were surrounding the area of operations with a line of camoflaged streloks when the Yujing spotted them and a battle commenced.


The Tartary forces react first.  The Tank Hunter with portable autocannon immediate attack the Blue Wolf Tag, damaging it and driving it into cover.  Meanwhile a Kazak Core Fireteam knock out a Husong Yaokong leaving it unconscious.  The forward observer within the Kazak core team immediate took two picture of the Yu Jing High Value Target, achieving its objectives in the game.  Satisfied, they fall back into a more defensive position near their base.


The Yujing retaliate by first repairing their heavy assets, the Blue Wolf Tag and the Husong.  The Husong immediately took the offensive, firing at the Kazaks.  Unfortunately the Kazak missile launcher and Frontovik sniper have a faster reaction, utterly destroying the Husong for good this time.  Liang Kai advance next, speedily charging into the Kazak fireteam and firing his shotgun blasts, knocking out the Kazak missile launcher and forward observer but dying in the process.  Meanwhile, the Yujing Zuyong also tried to skirmish with the Kazak core team but ended with no conclusive result.


The TAK second offensive commence with the medics healing the wounded, recovering the forward observer but losing the missile launcher firer.  They have met the second objective of recovering the wounded.  The weakened fire team advance, together with a Spetnaz that entered the battlefield, they took out a few Kuang Shi but are unable to kill the Sheng Ji and Zu Yong.


The Yujing second counteroffensive started by killing the Spetnaz, the Sheng Ji and Zu Yong duo charge into the TAK left flank, hoping to demolish a TAK supply house.  However the Tank Hunter with portable autocannon manage to delay them.  The Yujing then send the Blue Wolf Tag to the TAK right flank, this time successfully killing a wardriver and the Frontovik Sniper but got decommissioned by a barrage of small arms fire in return.


The TAK final chance to act.  The Streloks who were in camouflaged all this while sprang the ambush and after a few rounds of firefight manage to kill the Zuyong.  The Tank Hunter destroyed the Blue Wolf TAG while the Tartary fireteam forces abandoned their right flank and charge straight for the Yu jing supply house with the intention to detonate it.  This will be the last of their objectives.  Alas, they reach the building only to realise that none of them had the D-charges.  The Lieutenant of the TAK forces revealed herself, solitarily standing guard at the TAK base.


The Yujing forces are severely weakened, with no chance to meeting any objectives.  A lone Zhanshi charge into the TAK lines but was killed by the TAK Lieutenant standing guard.  The battle is over.

The TAK forces spirited away after the battle with the precious information at hand.  The next day, photos of the Yujing HVT circulated in the mass media and led to a scandal.  Within days, public opinion forced the Yujing forces to evaculate the zone.  E2 now belongs to Ariadna.


Friday, March 03, 2023

Infinity Game Countermeasures with Lawrence

 Had a game of countermeasures against Lawrence yesterday.  It is a hard mission as there are very few objectives that can be earned.

Manage to win because Equippe Mirage V is able to take out his specialists early game.  And some fantastic armour saves delayed his orders.

I only manage get to 1 objective only because I spend a lot of time to take out his 2 Geckos.


The bear cannot beat Mcmurrough due to the latter's martial arts.  Need the SAS to help


Gecko's down.  Time for objective


Thursday, April 28, 2022

Team Yankee World On Fire Later games

Hi all,

I have switch the TY World on Fire Battle Reports to Facebook in response to feedback.

The links are at

Game 2:

https://www.facebook.com/groups/TeamYankeeGame/permalink/2070364953138680/


Game 3: 

https://www.facebook.com/groups/TeamYankeeGame/permalink/2070536266454882/

Sunday, October 03, 2021

Team Yankee Battle Report - World on Fire - Round 1 US vs Iran

 I have signed up for BlitzMinis's World on Fire campaign and my first (and sadly only) game in Round One is vs Hongxi.  This is my first game of Team Yankee against Hongxi and also my first game against him since SEVEN years ago (see link at http://vernwardiary.blogspot.com/2014/06/) where we had Epic 40k.

For this game I am using my beloved M60A1 US Marine formation (with 3 M1 IPMs!) against Hongxi's dual formation (Chieftain and T-62) Iran list.  

My deployment consisted largely of two formations of M60s at each flank, and guarded by an anti-air unit.  The flanks are connected by a small unit of Humvees in the middle.

US's right flank, with M60s in the extreme right with LAV-AD, two TOW-2 Humvees held form a week link at the center.  Note that the clump of trees printed in the table cloth count as an actual forest in this game.


The US left flank, I used the LAV-25's spearhead rule to let my M60s deploy in the safety of the forest
.  My M109s are positioned in the forest at my deployment zone
Hongxi's left (my right).  Chieftains behind a hill with a big fat unit of Basji and artillery in the forest.

The Iranian right comprises of three chieftains and five T-62s.  A small M113 infantry platoon held the objective.  A small unit of 3 T-55s lies in the center.  They will perform an important role later


The Iranians kickstart the battle with the Basjis heading straight into the forest while the Chieftains crest the hill and take potshots at the lone M60 with the LAV-AD.  They missed.  

On the Iranian right, the chieftains did a cautious advance with the T-62s behind.  With no visible targets, the Iranians handed the turn to the Americans.

On the American right, I make the mistake of taking the chieftains head on.  5 M60s charge up the hill and retaliate.  The Chieftains either shrug off all the shots or bailed only to remount next turn.  As a consolation, the LAV-AD fired at the Basji pinning them

The American left did no better, eight shots from the M60s with no casualties incurred by the Chieftains.  A disappointing turn one for both Iranians and Americans.


Iranian turn two, the Basji failed to rally.  The chieftains fired at the exposed M60s and killed nothing! 


On the Iranian right, the chieftains fired at the exposed M60s .....and killed nothing as well.  For two turns the Iranian tanks had done nothing.


The Americans couldn't believe their luck! A single M60 left the cover of the forest to gain vision to the Iranian OP but alas a missed shot.  Meanwhile the remaining three M60s fired at the chieftains hoping that some shots will go through.  While the Iranians are not so lucky at hitting their targets, they sure can pass their saves with no casualties.

For only a while more though, a TOW-2 from the Humvees caused the first Chieftain casualty of the game.  Meanwhile the American artillery also manage to score another kill on the M113 transports.

On the American right, the confident M60s fired again but uh oh....the chieftains passed everything.  Maybe the US were too cocky.

The Iranian reserves arrived in turn 3.  They killed a VAD with no losses suffered despite failing all their saves (i had dismal FP rolls for my AA most of the day).  The remaining VAD will flee off the table next turn.  The following turn, they will move to the center of the board stay start taking out my MBTs.  The Chieftains also managed to take out a M60.

Not so lucky this time! On the Iranian left, the chieftain score three kills while the Basji rallied charged out of the forest towards the objective.

The volley was hurting.  The M60s reversed and take cover behind the hill while taking out the T-55s that finally made their way towards the US line.  The LAV-AD had a tough choice here, to continue shooting the Basji and risk being shot at by the chieftains? or just redeploy.  I chose the former, cutting big holes into the Basji formation. 

Not inside the pic, in the American left the M60s pull back into the safety of the trees after witnessing the terrible trade off in the right.  The humvees fired another Tow-2 and killed a second chieftain!  Leaving the last chieftain to flee the battlefield in the iranian turn

During the Iranian turn 4, their T-62 reserves arrived at their right to shore up their line.  The T-62 formation advanced to threaten the Americans hiding in the trees.  Next, the artillery killed off the LAVs and the humvees.  Meanwhile the Basji in the Iranian left finally reach the US objective, and killed a LAV-AD along the way.  


American Turn 4.  M1 IPM and marine infantry to the rescue.  Through a mixture of shooting and assaulting, they will kill off 2 chieftains and cut down the Basji to size (though the Basji manage to kill off another LAV-AD via the RPG in turn 5 before dyigng)

Turn 4 when the reinforcements arrived.
.
end of American turn 5 when the Basji were defeated but the LAV-AD lost another of their number.

Meanwhile on the American left, without any chieftains facing them anymore, the M60s charge forth and fire! Killing 2 T-62, they will eventually defeat the T-62 platform and make a mad dash for the Iranian objective.

Things got a bit messy from Iranian turn 5 onwards, basically the Iranian planes came in and took out 2 of the M1s.  the last M1 fled off the table.  The Chieftains manage to finally make their way across the forest and killed off the last of the M60s and LAV-ADs.  The iranian has achieved air superiority.  The Americans were so desperate that the AAVP were to move forward to use the AA MGs as AA platforms (my AA did badly today with the only kill coming from the AA MGs of the M109s, so all I could do what to throw more AA MG shots and hope for the best).

The US have only 3 tanks left to avoid formation break while Hongxi told me that he actually need one more dead chieftain for formation break as well (he keep on passing morale for that). but Alas, I ran out of AT options while he still have his airforce.  Desperate, my M60s make the final dash towards the objective, after 5-6 rounds of arty shelling, his infantry were effectively wiped out and all my M60s need to do is to reach there!

But it was too late, Hongxi manage to take out 2 M60s which led to the last tank fleeing in my turn and causing formation break.  The US forces were defeated.

With hindsight one may argue that I should have deploy my IPMs first and leave my AA weaponry in reserve, conserving them for the crucial moments and not letting them got shot up.  However, there was no way to really tell if Hongxi will put his aircraft in reserves or not! In the end, I chose the safer common route of putting my most expensive unit in reserve while deploying my AA early to shoot down his aircraft earlier (too bad he deploy them in reserves instead).

Well, it was great experience anyway so a win-win in my book.  As mentioned, I have not fought HX for years.  Losting this match for a chance to fight this battle is worth it.

=============

P.S: I realise I posted in the wrong blog.  But I am not going to change it since I took a lot of effort to make this post :).  Also I would like to mentioned that due to unfortunate turn of Covid19 related events in Singapore, I would be sheltering at home and forgoing my games for Round Two of the campaign.  There is a real likelihood that I will miss Round Three as well.  It's a pity but there isn't really a choice here.  Family matter first.

Saturday, June 19, 2021

Stargrave Fluff

 The Vondire family have secured the planet FO-Gamma (Fallout Gamma) and its native population in the last war.


The family plans to use their new subjects to conquer and colonise more worlds.  However in the early stages of their colonisation attempts, it is discovered that PSH genome of the FO-Gamna does not allow them to interbreed with human populations of other worlds.  The gametes of the PSH tend to kill off those of other genome rather than forming Zygotes.  This will significantly slow down colonization programmes as the Vondire family will have to ship both male and female settlers when building new colonies.


Gregory Vondire has been tasked to venture to the outer Realms to seek genetic manipulation technology to cure the FO-Gamma colonist of their genetic complication.

Some Fantasy Fluff to tie my games/collection together


I use the Warhammer Fluff as the parent setting as most of my minis are Warhammer.

======================

 [AOS] With the end of the Soul Wars launched by Nagash and thecease fire between the forces of Morathi and that of Sigmar, the Khainites of Flamescar Plateau felt secured enough to sent expeditions to the regions beyond.  Slaughter Queen Hellebron was assigned to lead an expedition to Ghur, the Realm of Beast.  To reach Ghur, Hellebron’s forces have to access the realmgate near the Chaos fortress of Castle Drakesbane, long held by the Khanites’ archfoes the Fist of the Everchosen.  Hellebron’s objective is to fight the way to the fortress, to either sack it or reduce it, so as to secure a secured line of communications to the Ghur Realmgate.  To achieve this goal, Hellebron has secured a fighting force of Witch Elves supported by Scathborne.  In addition, she expects to receive further support from the newly "liberated" Khanite city of Harr Kuron and her Aelven allies of Evergladia and Tiranoc-Ellyrion.

[Warlords of Erehwon] The Soul Wars had not been good to the Wood Elven Kingdom of Evergladia, originally the dominant power of Flamescar Plateau, the Wanderer clans have lost most of the holdings in the region to the forces of Sigmar.  The alliance with Morathi had nearly risked a full scale invasion of the home territories of Evergladia by Sigmar himself.  Now, with a breather provided by the ceasefire, Nomad Princess Eteranas Everglade has decided to find new lands to explore.  Already her scouts have reported a new land of Erehwon, an unexplored region away from the prying eyes of Sigmar.

[Frostgrave] Torn between their expedition into Erehwon, as well as their commitments to Khainites of Flamescar Plateau, the armies of Evergladia and Tiranoc-Ellyrion are stretched.  Garrisons in their holdings are being depleted to man the armies.  The leadership of the two elven kingdoms know that they are vulnerable and a potential solution was to make use of mass teleportation to move armies quickly from one warzone to another.  While the means to this end is not known, legends says that the dead city of Frostgrave holds many such long forgotten knowledge.  A small raiding party lead by Spellweaver Alarialle was thus sent to either seek the ancient knowledge or seize a magical artifact that will grant the kingdoms with the ability to perform mass teleportation.


Thursday, June 17, 2021

Infinity the Game - Unmasking

 On 17 June, I have a game of infinity using my TAK against Jonathan's Yujing.  We played the unmasking mission.

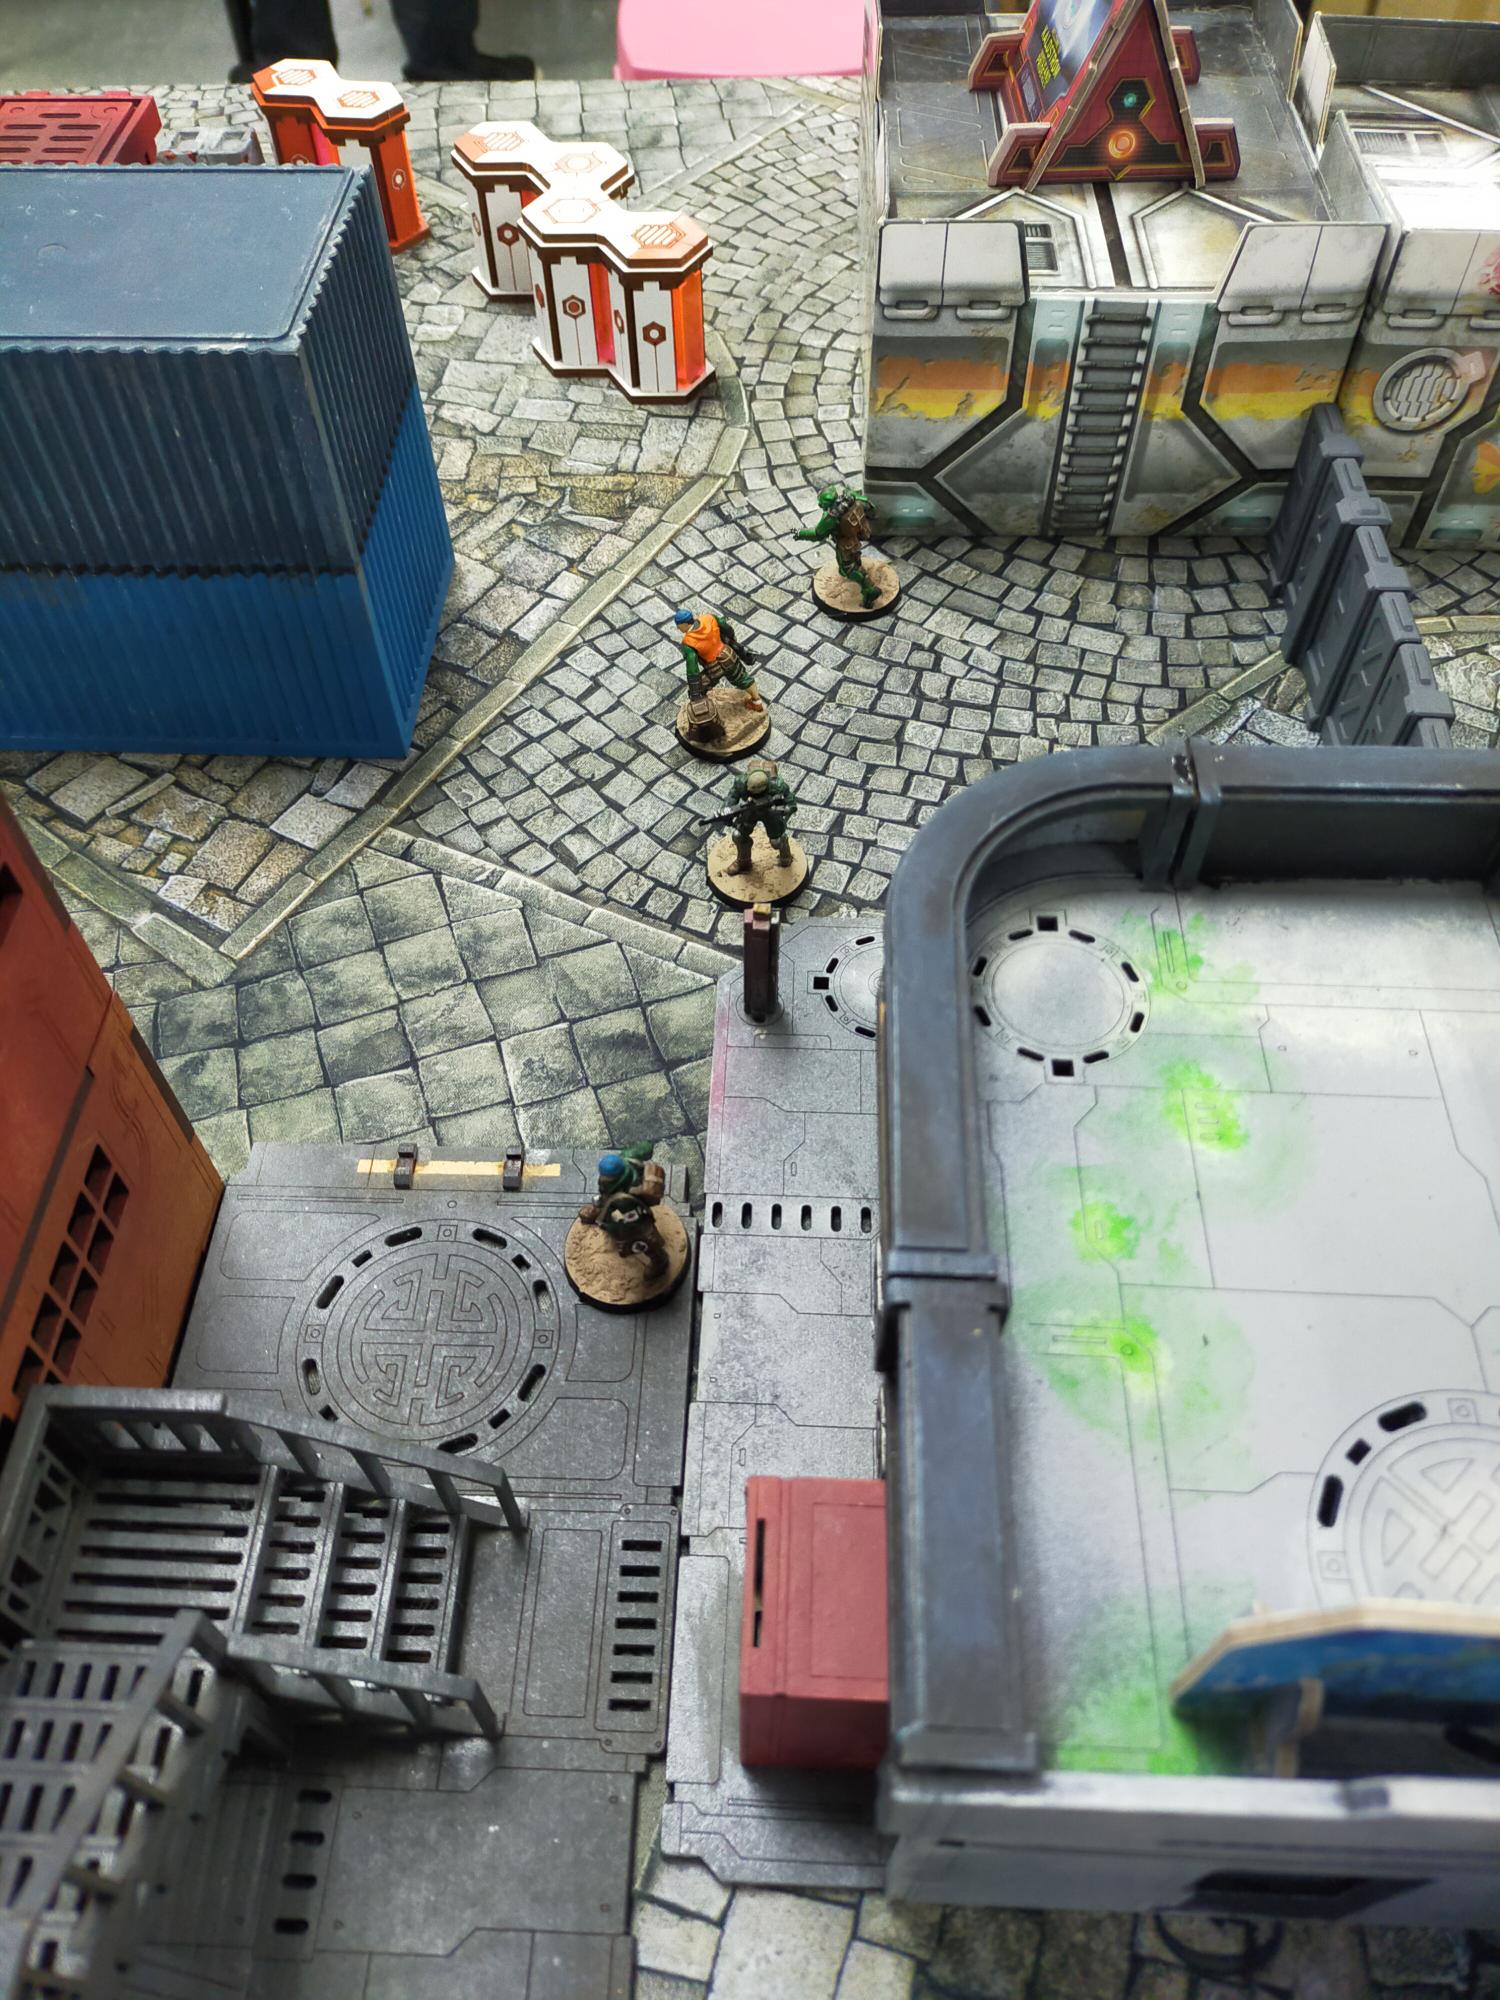
This is how the deployment looks like.

Jon's forces are mostly deployed on his right flank while his left is anchored by the Guijia and two bounty hunters.  He also have two guys, a tiger troop and a Liu Xing (Comet) that are deployable from air. I have both of my Irmandinos in each flank.  The left flank was further reinforced by a war driver and two Streloks (all three with boarding shotguns) while the right flank is reinforced by another Strelok with mines, and a Ratnik.  My center is occupied by my fire team, with a backup doctor.  My line kazak lieutenant is hiding at the rear with my autocannon tankhunter in the rear center building.  The idea is that the troops in the center can reinforce either left or right if the need arises.

 Jon goes first.  His hacker uneventfully approaches the console and he reveals the actual HVT.  The tiger troop then deploys successful and killed the HVT.  His Comet air drop into my deployment zone beside my hacker.  I ARO my hacker into cover (dodge).  In his next order, he tried to kill my hacker but the multiple AROs knocked out all his wounds instead.  As he has no wound incap, he places the Comet in suppressive fire.  

Lastly, his guijia climb up a building to dominate the Los to his two HVT, ready to kill anything that can threaten them.


In my turn one, I move my Irmandinos forward, they will eventually reach the consoles and reveal his HVT and one decoy (both near his guijia).  But before that, my autocannon came out of the hiding place and using two orders, I took out the guijia.  

Blast the Guijia out of the way!

In my left flank, the hacker kills the Comet and advances, ready to support the left Irmandino.  My fire team also moved out, take out his tiger troop before hugging terrain and ready for  turn 2.

War Driver is ready to shoot anything,
even if the Irmadhino is in line of fire!

Good job, now hold this position

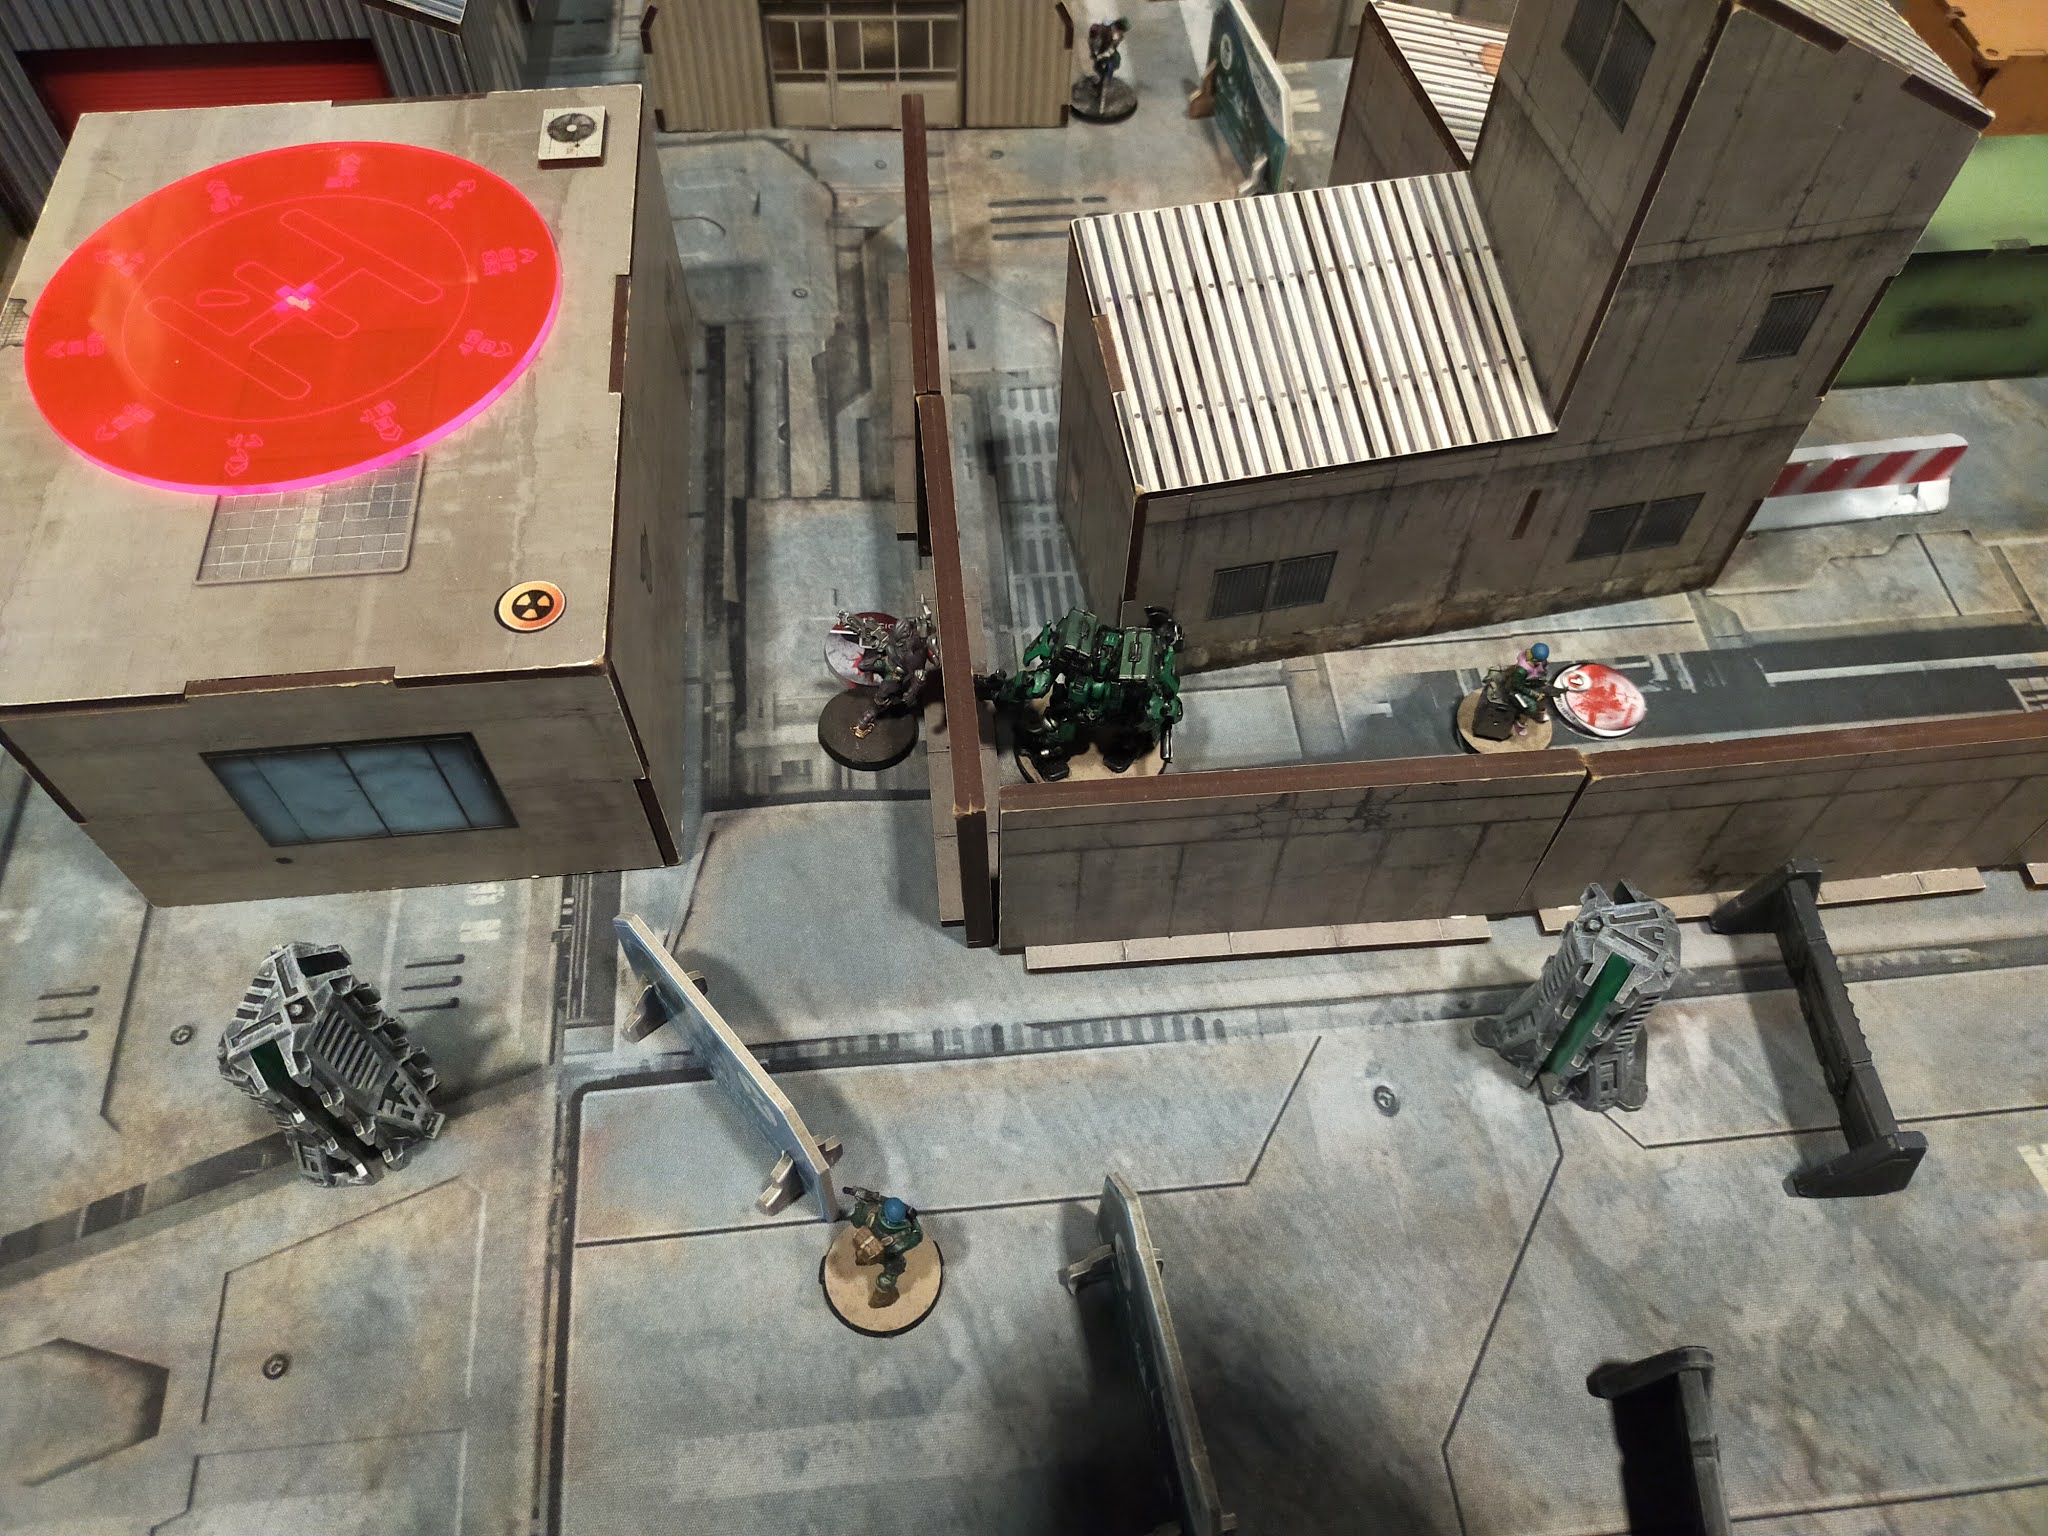
Yujing Turn 2, his right flank did a general advance (apologies that I cannot give much details as I dun understand Yujing much), killed my Irmandino and hacker.  

lots of unconcious models, ouch!

He also manage to cast spotlight onto my veteran kazak and send a missile over via his bot.  Killing the vet kazak and a line Kazak.  His guijia pilot tried to kill the FO of my remaining fire team but got killed by an ARO faceoff instead.

The center suddenly feels...spacious

TAK Turn two, I send my remaining Irmandinos to skirt round the walls to take out his HVTs, I did the smoke and move trick and was generally successful until just BEFORE my first target, I failed a dodge and went unconscious. It is left to the Ratnik!  I swap his team, make him move forward and climb over the wall.  This was then Jon's two bounty hunters aro me and tried to immbol me.  I passed all the saves.  The Ratnik then killed both the HVT and one decoy.  

The pink Irmadhino did a good run only to be knocked out in the final moment.  The Ratnik has to advance, climb over the wall and eat two shots before killing the HVT & decoy and securing a lead, which will accumulate in a victory eventually.  

With my last orders, I send the FO of the surviving fire team squad (they disbanded) and activate the last console, turning a potential draw to a win.

Yujing turn 3.  Jon's Ninja hacker move to the center and pressed the console, surviving all the ARO shots along the way.  However when he tried to let the ninja leave, a distant boarding shotgun shot finally took out the ninja (mimetism -6).  Jon's army thus hit breaking point and he retreats.  Actually he also notesd that he only have two orders left and he is unable to press the last console anyway.  So the game ends with a victory to the TAK.